

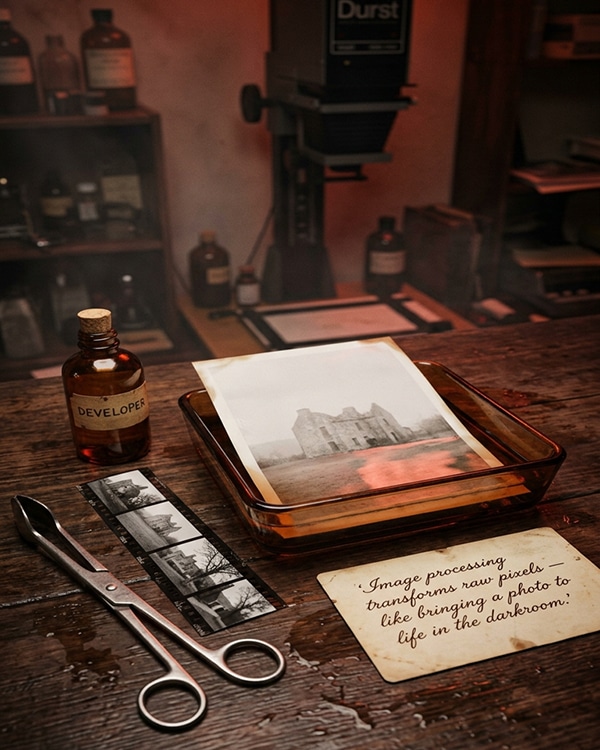
The Python Imaging Library (PIL) and its modern fork, Pillow, are the standard tools for basic image processing. You can resize images, crop them, rotate them, change colors, apply filters, add text, and much more.
This lesson introduces image processing with Pillow. You will learn to open and save images, convert between formats, resize and crop, apply filters, and draw on images. These skills are essential for web development, data science, and automation.
🕯️ Magic Note
Pillow is a fork of the original PIL (Python Imaging Library), which stopped development in 2011. Pillow is actively maintained and compatible with PIL. It supports dozens of image formats: JPEG, PNG, GIF, BMP, TIFF, WebP, and many more.
Bash
pip install Pillow
Python
from PIL import Image, ImageDraw, ImageFilter, ImageEnhance
Python
from PIL import Image
# Open an image
img = Image.open(“example.jpg”)
# Get image properties
print(f”Format: {img.format}”) # JPEG, PNG, etc.
print(f”Mode: {img.mode}”) # RGB, RGBA, L (grayscale), etc.
print(f”Size: {img.size}”) # (width, height) in pixels
print(f”Width: {img.width}”)
print(f”Height: {img.height}”)
print(f”Palette: {img.palette}”) # Palette for indexed images
# Display the image (opens in default viewer)
img.show()
# Save in different format
img.save(“output.png”) # Converts from JPEG to PNG
# Save with quality (for JPEG)
img.save(“output.jpg”, quality=85)
# Save with compression (for PNG)
img.save(“output.png”, optimize=True)
Python
from PIL import Image
# Create a new RGB image (black by default)
black_img = Image.new(“RGB”, (800, 600))
# Create a new image with a specific color
red_img = Image.new(“RGB”, (800, 600), (255, 0, 0)) # Pure red
# Create a new RGBA image (with transparency)
transparent_img = Image.new(“RGBA”, (800, 600), (0, 0, 0, 0)) # Fully transparent
# Create a grayscale image
gray_img = Image.new(“L”, (800, 600), 128) # Middle gray (0-255)
# Save the created image
red_img.save(“red_background.png”)
🕯️ Magic Note
Color modes: “RGB” (red, green, blue) for color images, “RGBA” (red, green, blue, alpha) for color with transparency, “L” (luminance) for grayscale, “CMYK” for print, “P” for palette-based images.
Python
from PIL import Image
img = Image.open(“example.jpg”)
print(f”Original size: {img.size}”)
# Resize to exact dimensions (may distort)
resized = img.resize((400, 300))
resized.save(“resized_exact.jpg”)
# Resize with aspect ratio preserved
new_width = 400
aspect_ratio = img.height / img.width
new_height = int(new_width * aspect_ratio)
scaled = img.resize((new_width, new_height))
# Using thumbnail (modifies in place, preserves aspect ratio, never enlarges)
img_copy = img.copy()
img_copy.thumbnail((400, 400)) # Scales down to fit within 400×400 box
img_copy.save(“thumbnail.jpg”)
# Resize with different resampling filters
img.resize((800, 600), Image.Resampling.LANCZOS) # High quality for downscaling
img.resize((800, 600), Image.Resampling.BICUBIC) # Good quality
img.resize((800, 600), Image.Resampling.NEAREST) # Fast, pixelated
Python
from PIL import Image
img = Image.open(“example.jpg”)
# Crop using (left, top, right, bottom) coordinates
cropped = img.crop((100, 50, 300, 200))
cropped.save(“cropped.jpg”)
# Crop center square
width, height = img.size
square_size = min(width, height)
left = (width – square_size) // 2
top = (height – square_size) // 2
center_crop = img.crop((left, top, left + square_size, top + square_size))
center_crop.save(“center_square.jpg”)
# Crop and then resize to standard size
cropped_resized = img.crop((100, 50, 300, 200)).resize((200, 150))
cropped_resized.save(“cropped_resized.jpg”)
Python
from PIL import Image
img = Image.open(“example.jpg”)
# Rotate 90 degrees
rotated_90 = img.rotate(90)
rotated_90.save(“rotated_90.jpg”)
# Rotate 45 degrees (expands canvas to fit)
rotated_45 = img.rotate(45, expand=True)
rotated_45.save(“rotated_45_expand.jpg”)
# Rotate 45 degrees (keep canvas size, parts cropped)
rotated_45_crop = img.rotate(45, expand=False)
rotated_45_crop.save(“rotated_45_crop.jpg”)
# Fill background when rotating (with transparency)
from PIL import ImageDraw
background = Image.new(“RGBA”, img.size, (255, 255, 255, 0))
rotated = img.rotate(45, expand=True)
# Flip horizontally (mirror)
flipped_h = img.transpose(Image.Transpose.FLIP_LEFT_RIGHT)
flipped_h.save(“flipped_horizontal.jpg”)
# Flip vertically
flipped_v = img.transpose(Image.Transpose.FLIP_TOP_BOTTOM)
flipped_v.save(“flipped_vertical.jpg”)
# Transpose (90, 180, 270, etc. are available)
transposed = img.transpose(Image.Transpose.TRANSPOSE) # Swap x and y
Python
from PIL import Image
img = Image.open(“example.jpg”)
print(f”Original mode: {img.mode}”)
# Convert to grayscale (L mode)
gray = img.convert(“L”)
gray.save(“grayscale.jpg”)
# Convert to RGB (if not already)
rgb = gray.convert(“RGB”)
# Convert to RGBA (adds alpha channel)
rgba = img.convert(“RGBA”)
# Convert to mode P (palette-based, 256 colors)
palette = img.convert(“P”, palette=Image.Palette.ADAPTIVE)
palette.save(“palette.png”)
# Split an RGB image into separate channels
if img.mode == “RGB”:
r, g, b = img.split()
r.save(“red_channel.jpg”)
g.save(“green_channel.jpg”)
b.save(“blue_channel.jpg”)
# Merge channels back
merged = Image.merge(“RGB”, (r, g, b))
🕯️ Magic Note
The split() method separates a color image into its component bands. merge() combines bands back together. This is useful for channel-based operations like swapping red and blue channels.
Python
from PIL import Image, ImageFilter
img = Image.open(“example.jpg”)
# Blur filters
blurred = img.filter(ImageFilter.BLUR)
blurred.save(“blurred.jpg”)
gaussian_blur = img.filter(ImageFilter.GaussianBlur(radius=5))
gaussian_blur.save(“gaussian_blur.jpg”)
# Sharpen
sharpened = img.filter(ImageFilter.SHARPEN)
sharpened.save(“sharpened.jpg”)
# Edge detection
edges = img.filter(ImageFilter.FIND_EDGES)
edges.save(“edges.jpg”)
# Emboss
embossed = img.filter(ImageFilter.EMBOSS)
embossed.save(“embossed.jpg”)
# Contour
contoured = img.filter(ImageFilter.CONTOUR)
contoured.save(“contoured.jpg”)
# Detail enhancement
detailed = img.filter(ImageFilter.DETAIL)
detailed.save(“detailed.jpg”)
# Custom kernel convolution
kernel = [1, 0, -1, 1, 0, -1, 1, 0, -1] # Example edge detection
custom = img.filter(ImageFilter.Kernel((3, 3), kernel, scale=1))
custom.save(“custom_filter.jpg”)
Python
from PIL import Image, ImageEnhance
img = Image.open(“example.jpg”)
# Brightness (1.0 is original)
enhancer = ImageEnhance.Brightness(img)
brighter = enhancer.enhance(1.5)
darker = enhancer.enhance(0.5)
brighter.save(“brighter.jpg”)
# Contrast
enhancer = ImageEnhance.Contrast(img)
more_contrast = enhancer.enhance(1.5)
less_contrast = enhancer.enhance(0.5)
more_contrast.save(“more_contrast.jpg”)
# Color saturation
enhancer = ImageEnhance.Color(img)
more_color = enhancer.enhance(1.5)
less_color = enhancer.enhance(0.5)
grayscale = enhancer.enhance(0.0)
# Sharpness
enhancer = ImageEnhance.Sharpness(img)
sharper = enhancer.enhance(2.0)
sharper.save(“sharper.jpg”)
Python
from PIL import Image, ImageDraw, ImageFont
img = Image.open(“example.jpg”)
draw = ImageDraw.Draw(img)
# Draw a rectangle
draw.rectangle([(50, 50), (200, 150)], outline=”red”, width=3)
# Draw a filled rectangle
draw.rectangle([(50, 50), (200, 150)], fill=(255, 0, 0, 128)) # Semi-transparent red
# Draw a circle (ellipse with equal sides)
draw.ellipse([(300, 50), (450, 200)], outline=”blue”, width=2)
# Draw a line
draw.line([(0, 0), (img.width, img.height)], fill=”green”, width=3)
# Draw text
try:
font = ImageFont.truetype(“arial.ttf”, 36)
except IOError:
font = ImageFont.load_default()
draw.text((100, 300), “Hello, Image!”, fill=”white”, font=font)
# Draw a polygon
draw.polygon([(500, 100), (600, 200), (550, 300), (450, 200)], outline=”yellow”, fill=”orange”)
img.save(“drawn.jpg”)
🕯️ Magic Note
Drawing on images is great for adding watermarks, labels, bounding boxes, or annotations. You can also draw directly on a new blank image to create graphics from scratch.
Python
from PIL import Image, ImageDraw, ImageFont
from pathlib import Path
def add_watermark(input_path, output_path, text, opacity=128):
“””Add a text watermark to an image.”””
img = Image.open(input_path)
# Create a transparent overlay layer
watermark = Image.new(“RGBA”, img.size, (0, 0, 0, 0))
draw = ImageDraw.Draw(watermark)
# Get font (fallback if truetype not available)
try:
font_size = int(img.width / 15)
font = ImageFont.truetype(“arial.ttf”, font_size)
except IOError:
font = ImageFont.load_default()
# Text position (bottom right corner)
bbox = draw.textbbox((0, 0), text, font=font)
text_width = bbox[2] – bbox[0]
text_height = bbox[3] – bbox[1]
padding = 20
position = (img.width – text_width – padding, img.height – text_height – padding)
# Draw white text with opacity
draw.text(position, text, fill=(255, 255, 255, opacity), font=font)
# Composite the watermark onto the original
if img.mode != “RGBA”:
img = img.convert(“RGBA”)
watermarked = Image.alpha_composite(img, watermark)
watermarked.save(output_path)
print(f”Watermarked: {output_path}”)
# Batch process all images in a folder
def batch_watermark(folder_path, watermark_text):
folder = Path(folder_path)
output_folder = folder / “watermarked”
output_folder.mkdir(exist_ok=True)
for img_path in folder.glob(“*.jpg”):
output_path = output_folder / img_path.name
add_watermark(img_path, output_path, watermark_text)
# batch_watermark(“photos”, “Feloriya Photography”)
- Forgetting to convert mode before saving (RGBA to RGB for JPEG)
- Not handling different color modes in operations
- Using JPEG for images with transparency (use PNG)
- Modifying the original image without copying (create a copy with .copy())
- Not closing images (though Pillow handles this, use context managers for many files)
- Assuming all images have the same size when resizing a batch
- How do you open an image and get its dimensions?
- Write code to resize an image to 800×600 while preserving aspect ratio.
- How do you convert an image to grayscale?
- Write code to add a text watermark to the bottom-right corner of an image.
- What is the difference between JPEG and PNG formats?
- How do you apply a Gaussian blur to an image?
⚡ Whisper
Images are more than pixels. They are memories, products, documents, art. With Pillow, you can read them, write them, resize them, crop them, rotate them, filter them, enhance them, draw on them. Each operation is a transformation. A large image becomes a thumbnail. A color photo becomes grayscale. A noisy photo becomes sharp. A blank canvas becomes a masterpiece. The tools are simple. The possibilities are endless. Resize for web. Convert for format. Watermark for protection. Annotate for explanation. Process a thousand images in a loop. Pillow handles them all. Learn the basics. Open. Save. Resize. Crop. Convert. Filter. With these, you can build image processing pipelines. For web development, for data science, for automation. The images are waiting. Transform them.


